
The GY-271(QMC5883L) Compass Module has been developed to provide accurate heading information through a digital interface, making it ideal for use in small-scale projects such as UAVs and robot navigation systems. This sensor has the ability to convert magnetic fields into a differential voltage output on three separate axes, which is then used as the raw digital output value. This allows for the calculation of headings or the detection of magnetic fields originating from varying directions. Despite its compact size, this module offers precise magnetic sensing capabilities that are suitable for a wide range of applications.
Difference between GY-271(QMC5883L) and HMC5338L?
Both the HMC5338L and QMC5883L compass modules are designed to perform the same basic operation.
However, they achieve this using different I2C addresses and internal register locations.
Despite these differences, both modules feature exactly the same pinout, which means that the QMC5883L module can be used as a replacement for the HMC5338L.
Note: Both items work with different software.
Both items output data is the same, the calibration process is similar.
Here is the process of connecting the GY-271(QMC5883L) Compass Magnetometer to Arduino and provide you with some tips on how to get the most out of your compass magnetometer.
First, let’s take a look at the components that we’ll need for this project:
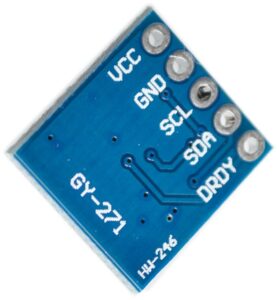
Pin introduction:
VCC -Power 3~5V
GND -GND
SCL -I2C Clock
SDA -I2C data
DRDY – Interrupting pin for data preparation, DRDY is pulled up inside and keeps the low level for 250μsec when the data are on the output register.
Once you have these components, you’re ready to start interfacing the QMC5883L Compass Magnetometer with Arduino. Follow the steps below to get started:
Step 1: Connect the QMC5883L Compass Magnetometer to Arduino
To connect the QMC5883L Compass Magnetometer to Arduino, follow the connections below:
VCC — 3 -5V
GND — GND
SDA — A4
SCL — A5
Step 2: Download and Install the QMC5883L Library
To make things easier, we’ll be using a library to interface the QMC5883L Compass Magnetometer with Arduino. Download the QMC5883L library from the Arduino Library Manager or from Github and install it on your computer.
Step 3: Upload the Example Sketch to Arduino
Once you’ve installed the library, upload the example sketch “QMC5883L_raw.ino” to your Arduino board. This sketch will read the raw data from the QMC5883L Compass Magnetometer and output it to the serial monitor.
Step 4: Calibrate the Compass Magnetometer
To get accurate readings from your QMC5883L Compass Magnetometer, you’ll need to calibrate it. To do this, follow the steps below:
- Hold the QMC5883L Compass Magnetometer flat and away from any magnetic objects.
- Open the Serial Monitor in the Arduino IDE.
- Send the letter ‘c’ to the Arduino. This will start the calibration process.
- Rotate the QMC5883L Compass Magnetometer around all three axes until the calibration is complete.
Step 5: Display the Heading
Now that your GY-271(QMC5883L) Compass Magnetometer is calibrated, you can display the heading on the serial monitor. To do this, upload the sketch below to your Arduino board:
#include <Wire.h>
#include <Adafruit_Sensor.h>
#include <Adafruit_QMC5883.h>
Adafruit_QMC5883 qmc;
void setup() {
Serial.begin(9600);
if (!qmc.begin()) {
Serial.println(“Could not find a valid QMC5883L sensor, check wiring!”);
while (1);
}
}
void loop() {
sensors_event_t event;
qmc.getEvent(&event);
float heading = atan2(event.magnetic.y, event.magnetic.x);
if (heading < 0) {
heading += 2 * PI;
}
Serial.print(“Heading: “);
Serial.println(heading * 180 / PI);
delay(100);
}
By following these steps, you can interface the GY-271(QMC5883L) Compass Magnetometer with Arduino and get accurate readings of the heading.
We hope that this article has been helpful and that you’ve enjoyed reading it.